
Training a Classifier
Unlike AI Models, which run a pretrained deep-learning network you supply as a TorchScript export, AI training trains a lightweight classical machine-learning model - Random Forest, k-Nearest Neighbors, or a small neural network (MLP) - directly from examples you paint on your own images. No external model file is needed to get started; the model is built entirely from your annotations and saved as an .evamodel file.
Open it with EVA › AI training…. It opens as a sheet on the right, so the image and your annotations stay in view while you set it up.
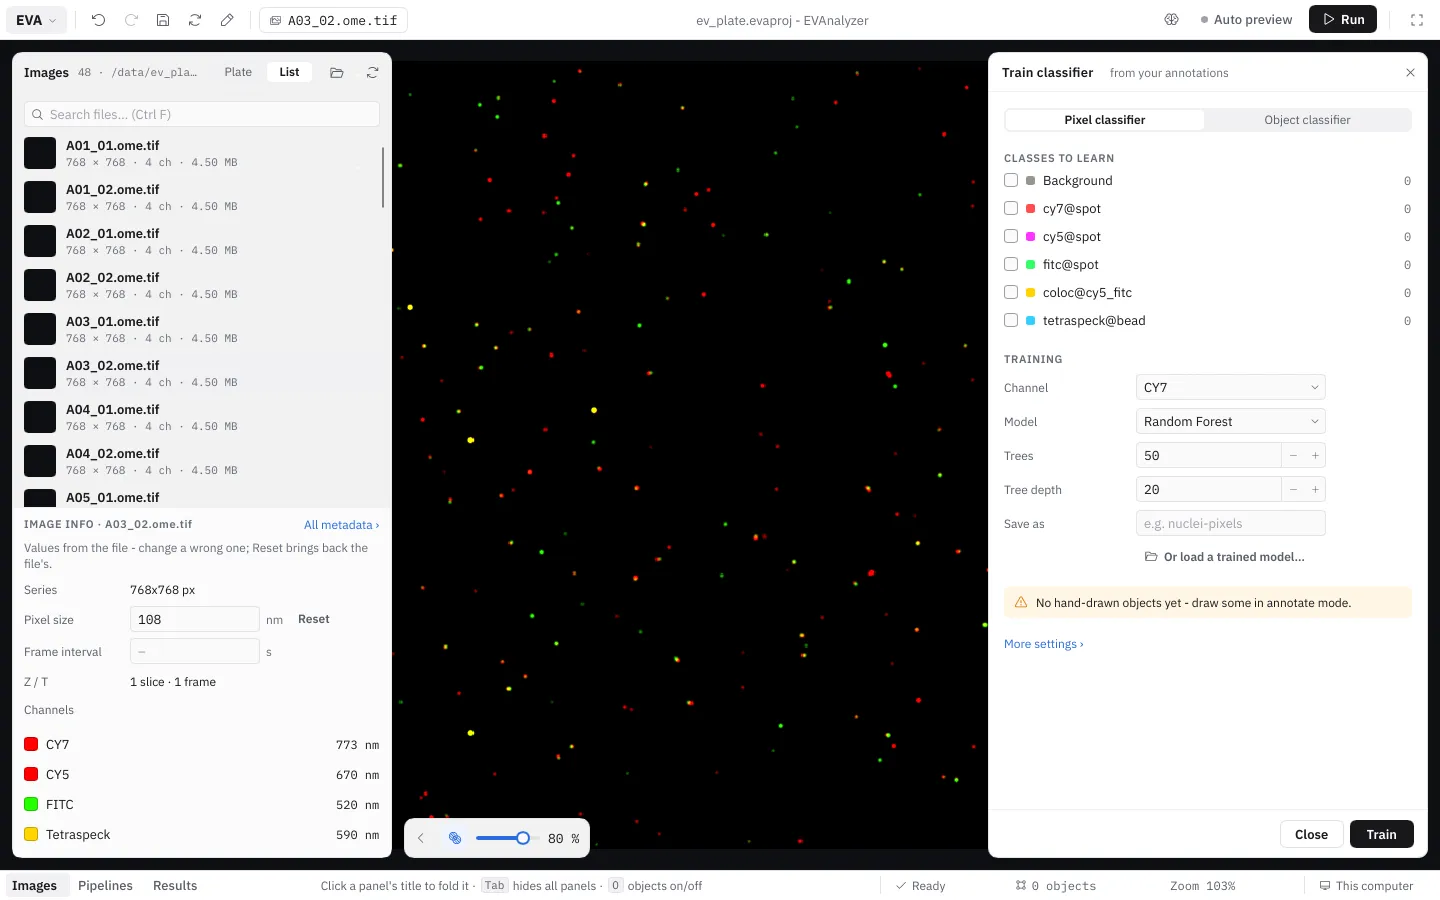
Two Kinds of Classifier
Section titled “Two Kinds of Classifier”| Classifier Type | Classifies | Feature source | Comparable to |
|---|---|---|---|
| Pixel Classifier | Every pixel of an image, independently | Intensity and texture/edge filters computed around each pixel | ilastik-style pixel classification |
| Object Classifier | Objects already extracted by a pipeline (or painted directly) | Shape and per-channel intensity metrics of each object | A learned alternative/complement to Classify Objects’s rule-based criteria |
A Pixel Classifier produces a segmentation mask - the same output shape Threshold produces - so it slots into a pipeline before Connected Components/Extract Objects. An Object Classifier instead scores objects that already exist in the pipeline cache, the same input Classify Objects works from.
Workflow
Section titled “Workflow”1. Provide examples with the painting tool
Section titled “1. Provide examples with the painting tool”Both classifier types learn from objects you draw in annotate mode (Rectangle, Ellipse, Polygon or the Brush), independent of any pipeline.
- Pixel Classifier - paint a few representative patches of each class you want to predict, and paint a couple of background patches too. The classifier needs negative examples of everything that isn’t a target class, not just positive examples of the classes themselves - a model trained only on “Nucleus” patches has never seen what a non-nucleus pixel looks like.
- Object Classifier - paint around whole objects (or run a segmentation pipeline first and use its output) - each candidate object gets its class assigned inside the training dialog itself, in the next step, not beforehand.
2. Open AI training and set up the model
Section titled “2. Open AI training and set up the model”Open EVA › AI training…. Pick the Classifier (Pixel or Object) and name the Model. Optionally click Or load a trained model… to continue training a previously-saved model instead of starting fresh.
3. Assign classes to painted objects
Section titled “3. Assign classes to painted objects”The Training objects list shows every manually-painted object in scope (the current image, or every project image if Annotations of other images too is enabled under Training data source). For each one:
- Assign a class from the dropdown.
- Uncheck Train on this to exclude a bad or outlier annotation from training without deleting it.
Only objects with a class assigned here are used as training samples.
4. Pick which classes to train on
Section titled “4. Pick which classes to train on”The Classes to learn list - each class with its number of examples - controls which of the project’s classes become prediction targets. Classes with at least one labeled object are pre-checked, but any class can be selected ahead of labeling it.
5. Choose an algorithm
Section titled “5. Choose an algorithm”Pick Random Forest, K-Nearest Neighbors, or Neural Network (MLP). The sheet shows the training in short; More settings › opens all of the model’s settings - see Choosing a Model below.
6. Configure features
Section titled “6. Configure features”- Pixel Classifier - pick the Image channel to train on and build a Feature channels list - see Feature Best Practices.
- Object Classifier - check the Object metrics to use - see Choosing Object Metrics.
7. Train
Section titled “7. Train”Click Train. A status banner shows progress; for MLP, it streams live train/validation loss per epoch. Cancel stops an in-flight run. The sheet stays open after training finishes so you can inspect the result and retrain without losing your settings.
8. Use the model in a pipeline
Section titled “8. Use the model in a pipeline”The trained model is saved to <project>/models/<model name>.evamodel. Add an AI Pixel Classifier or AI Object Classifier step to a pipeline and point it at that file.
Choosing a Model
Section titled “Choosing a Model”| Algorithm | Good default when… | Key defaults |
|---|---|---|
| Random Forest | You want a robust first try - insensitive to feature scale, tolerates noisy or redundant features well | 50 trees, max depth 20 (capped deliberately - a pixel classifier re-walks every tree for every pixel of every image at inference time, so depth/tree-count trade accuracy for prediction speed) |
| k-Nearest Neighbors | Classes form simple, well-separated clusters in feature space | k = 5, distance-weighted voting, Cover Tree search |
| Neural Network (MLP) | You have a larger, more varied set of labeled examples and a feature set too complex for a simple decision boundary | Hidden layers 64, 32, ReLU, 200 epochs, Adam optimizer (learning rate 0.001) |
For MLP, watch the per-epoch status banner: if validation loss climbs while training loss keeps falling, the model is overfitting - add more/more varied examples, or shrink the hidden-layer sizes, rather than just training longer. A validation split is only computed once there are at least 25 total training samples; below that, only training loss is shown.
See Random Forest, k-Nearest Neighbors, and Neural Network (MLP) for a detailed look at how each algorithm actually works.
Feature Best Practices (Pixel Classifier)
Section titled “Feature Best Practices (Pixel Classifier)”Each entry in Feature channels is one input to the classifier, computed from the selected Image channel:
| Feature | Captures |
|---|---|
| Raw | The unfiltered pixel value - always worth including as a baseline |
| Gaussian Blur | Local intensity averaged over a radius (σ) - texture/context at a given scale |
| Sobel | Edge strength |
| Laplacian | Zero-crossing edges (second derivative) |
| Structure Tensor | Local orientation and coherence (Eigenvalue X/Y, Coherence) |
| Hessian | Blob- and ridge-like structures (Determinant, Eigenvalue X/Y) |
| Rank Filter | Local statistics - mean, median, min, max, or outlier deviation |
A few rules of thumb (the same approach ilastik’s pixel classification is built around):
- Combine a few filter types across several scales, rather than many filter types at one scale. Use Quick add blur scales to add the same Gaussian Blur at several σ values at once (e.g.
1, 2, 4, 8) - small σ picks up fine detail, larger σ adds regional context. - Pair Laplacian/Hessian with pre-blurring. Both are second-derivative filters and amplify noise; enabling their Pre-blur option (Laplacian-/Hessian-of-Gaussian) smooths the image first.
- Pixel classifiers train on a single image channel. If the discriminating signal is spread across channels, you’ll need to pick the most informative one or train separate models.
- Colour (RGB) images are supported. On an RGB image every feature channel is computed separately on the red, green and blue planes, so the classifier sees the colour information. A model trained on colour images can only be applied to colour images, and one trained on grayscale images only to grayscale images - EVAnalyzer refuses to apply it to the other kind. All training images of one model must therefore be of the same kind; a mixed set is refused before training starts.
- More features cost more inference time (every pixel of every image needs every feature computed) without necessarily improving accuracy - start small and add features only where the classifier is actually confusing two classes.
Choosing Object Metrics (Object Classifier)
Section titled “Choosing Object Metrics (Object Classifier)”The Object metrics checklist offers shape metrics (Area, Perimeter, Circularity, Solidity, Aspect Ratio, Roundness, Compactness, Feret/Min Feret Diameter, Ellipse Major/Minor/Angle, Eccentricity, Touches Edge) and per-channel intensity statistics (Sum, Min, Max, Average).
The object’s own assigned class and its centroid/position are deliberately excluded - including the class would leak the training label itself, and position would teach the model where an object is instead of what it looks like, a classic overfitting trap.
Pick a handful of metrics that actually distinguish your classes rather than checking everything - e.g. Circularity + Solidity to separate round vesicles from irregular debris, or a channel’s Intensity Average to separate marker-positive from marker-negative objects. Fewer, meaningful features generalize better from a limited set of hand-labeled examples.