Classification
The Classification tab is where you define the object populations that your pipelines will detect and measure. Every detected object is assigned to one ore more classes class.
What is a Class?
Section titled “What is a Class?”A class represents a distinct object population in your experiment. Examples:
dapi@nucleus- nuclei stained with DAPIcy5@spot- extracellular vesicles in the Cy5 channelcy7@spot- vesicles in the Cy7 channelcoloc@cy5cy7- vesicles colocalising across both channels
Adding and Editing Classes
Section titled “Adding and Editing Classes”Click the + button to add a new class. Select an existing class and click the Edit button to open the Class Editor, which lets you set:
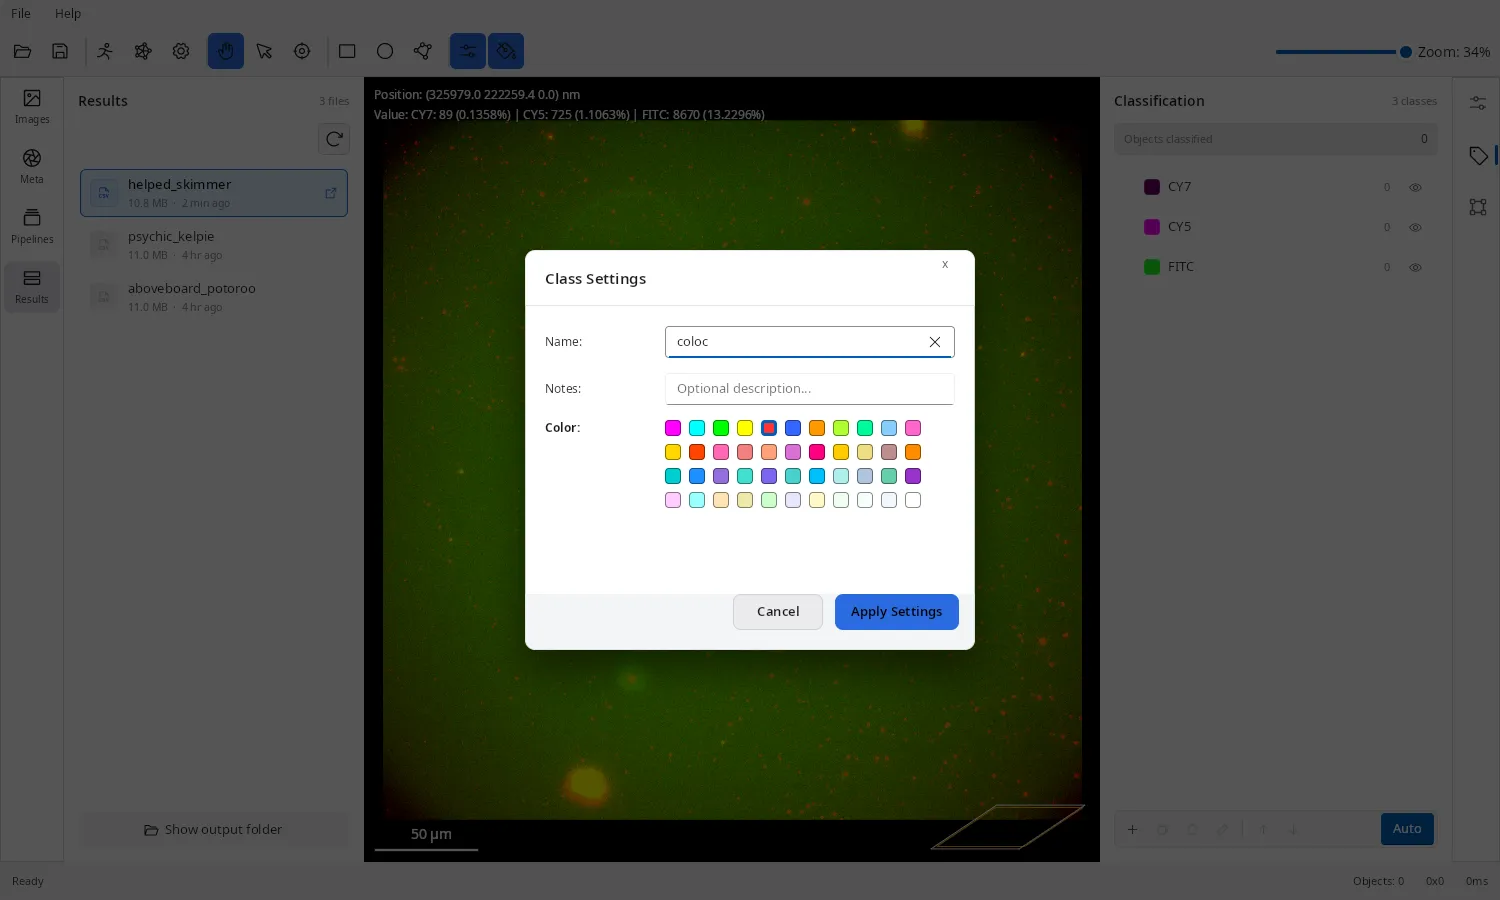
| Field | Description |
|---|---|
| Name | Class label, e.g. cy5@spot |
| Colour | Display colour used for detected objects in the viewer |
| Notes | Optional free-text description |
Auto-populate from Image Metadata
Section titled “Auto-populate from Image Metadata”Click the Auto button to have EVAnalyzer automatically create classes based on the channel information read from the current image. This creates one class per image channel as a starting point.
How Classes Relate to Pipelines
Section titled “How Classes Relate to Pipelines”Each pipeline step that produces objects must specify a target class. There are two ways a class is assigned:
- Extract ROIs - the first object-extraction step in a pipeline assigns a segmentation class (an internal intermediate class used to hold the binary mask results).
- Classify ROIs - converts segmentation-class objects into named user classes, applying optional filters (area, circularity, intensity) to accept or reject each detected region.
Downstream steps - Colocalization, Voronoi, Distance Transform - all reference classes by name to select their input objects.